
Installation
Some Android devices may first require the user to "Allow unknown apps". Instructions for this, and for installing the APK, can be found here. An
Configuring an MCS Host
Note: The app requires a valid Wi-Fi connection.
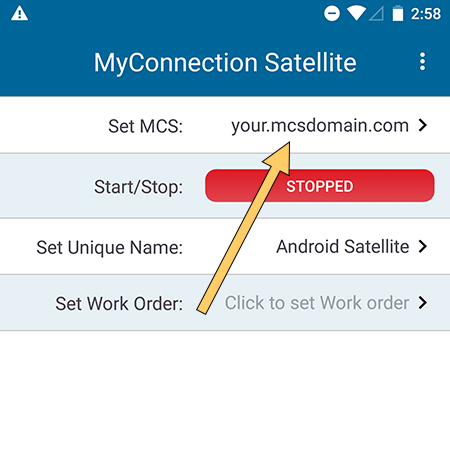
When the "MyConnection" app is first launched, the screen will look similar to the image below.
Before starting, an installation of MyConnection Server (MCS) must be specified. Click the top row (MCS Status:) to configure this.
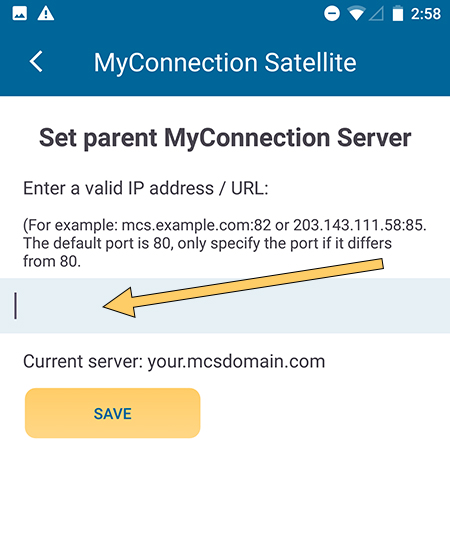
A screen like the one in the second image will appear. Enter the MCS URL/IP (for example mcs.example.com or mcs.example.com:81 if a different port is required) and press the
Note: The installation must be accessible. The agent also needs to be permitted, which requires login privileges.
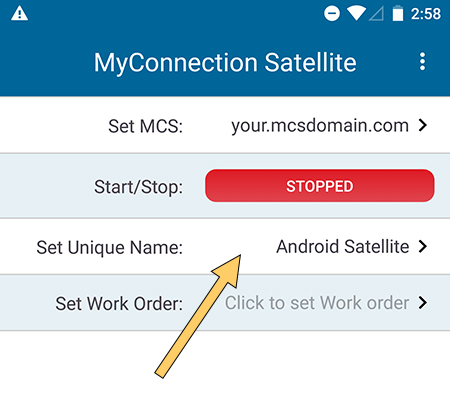
Set Satellite Name
Tap the
After entering the name, tap
Optional: Set Work Order
Running the satellite without specifying a work order name will cause it to enter
By entering a valid work order name, the satellite will connect and begin running work immediately.

Satellite Running
Start the app by tapping the "Stopped" button. This will change to "Running" and the app will begin initiating.
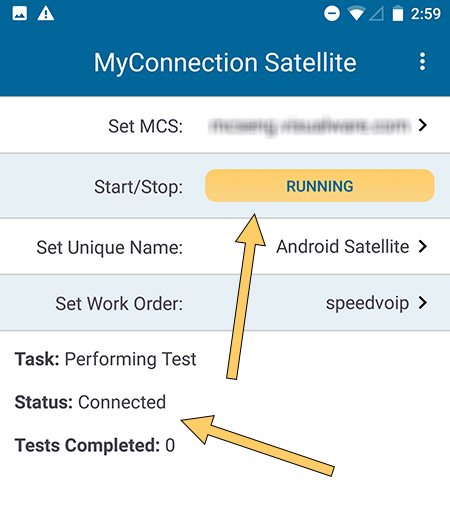
If the satellite has a valid work order assigned, the app status updates will begin to populate. At the server, the satellite instance will appear in the
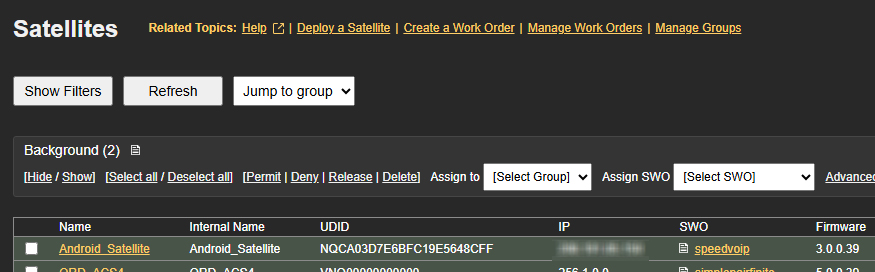
If the satellite was not assigned a work order, and is therefore in managed mode, it will appear in the
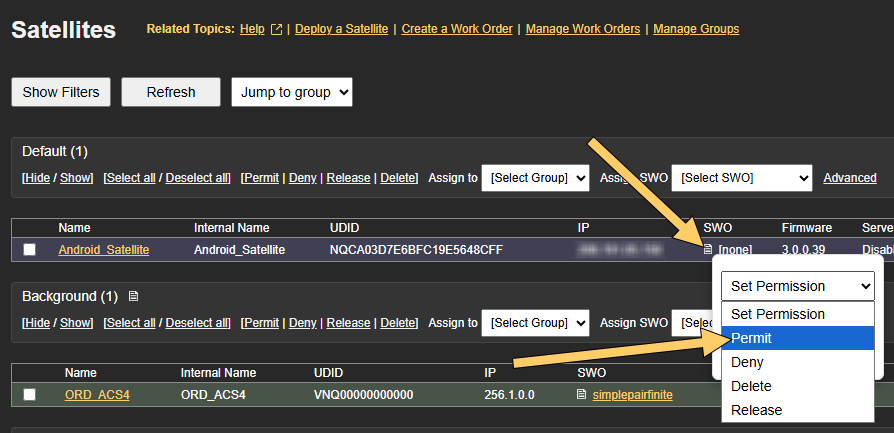
Once permitted, work can be assigned.

Data
When viewing reports on the server, the unique name set during this process appears as the third barrel of the session ID, as shown below.
