You are here
Auto send an email when a browser test has completed

This tutorial explains how to trigger an email automatically when a test has completed. This process uses the MCS event system in conjunction with the test Session ID.
From the MCS main menu click the General Config link (fig 1). The SMTP settings will be at the bottom of the resulting page (fig 2).
Enter the SMTP details and use the test email settings button to confirm the settings are correct. Once that is confirmed click the Submit Changes button.
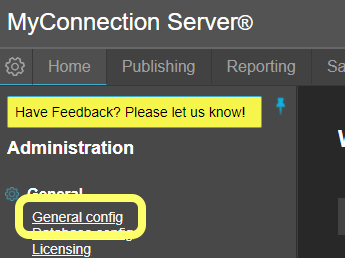
Fig 1: General Config link
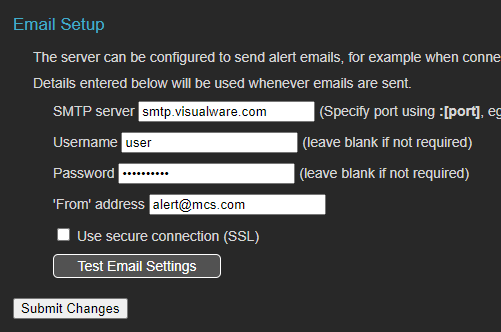
Fig 2: Email SMTP Settings
The email MCS sends will be based on a template. To configure an email template click on the Configure Events link in the MCS administration menu and then the Customize Email Templates link.
Enter a name for the new email template and click the Create button. The resulting page allows an email template to be created using standard text and MCS variables. The example below (fig 3) shows how a VoIP email might be compiled.
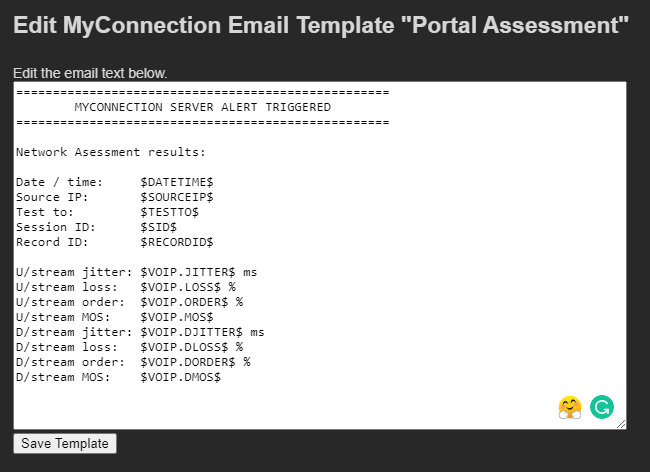
Fig 3: Email template
Click the Save Template button when editing is complete.
Click the Configure Events link in the main MCS administration menu. On the next page enter a name for the new event and click the Create button.
Choose 'When a test is performed which meets certain criteria' from the drop down menu and check the 'With a specific Session ID' check box.
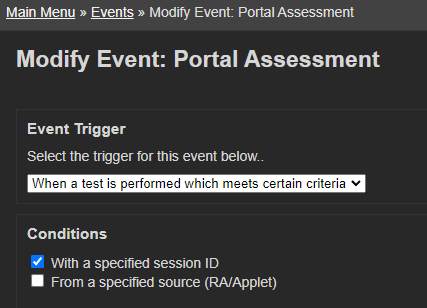
Fig 4: Modify event
Scroll down to the bottom of the event configuration page and do the following...
*Setting the Session ID will be covered below. This example is designed to pin point specific tests, not ALL tests. So, it's important to ensure the characters at the start of the session ID are unlikely to be replicated. In the example below, the event will fire for any test with a session ID that starts with VOIPPA_ (note the * that denotes a wildcard, meaning any characters can appear after VOIPPA_ and the event will fire.
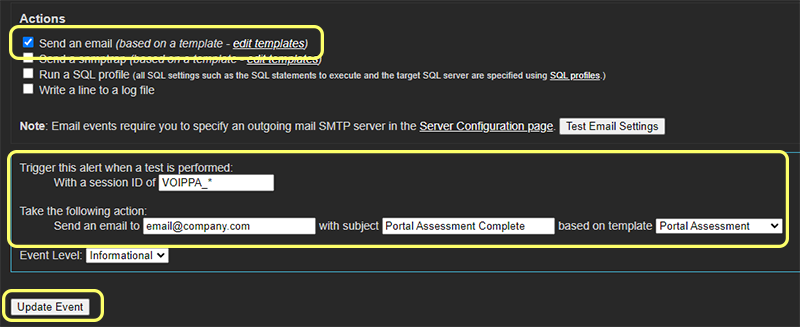
Fig 5: Email and SID settings
The event in step 3 above has been set up to trigger for a session ID that starts with VOIPPA_. So, how is this achieved?
When a browser test is published in MCS it creates an HTML page, which contains test parameters.
Editing the page to add the session ID parameter is the key step. The image below (fig 6) shows the parameters for one of the default MCS VoIP tests.
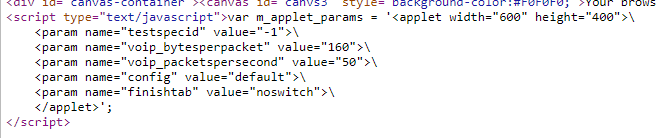
Fig 6: VoIP test parameter tags
The parameter required is <param name="sid" value="*VOIPRA_">. With this added to the test page the event configured will fire and an email will be sent.
This alone isn't much use. Creating a Session ID on a test by test basis can be done programatically and can be achieved with some basic JavaScript. This tutorial touches on some basics that will be required.
If the browser test example above is run with the correct session ID then an email will be triggered.