Alert when a RA fails to connect
Alert Type
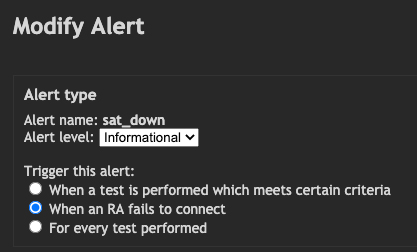
The first step is to choose the alert type from the drop down menu, shown below. This first involves choosing the level of alert (Informational, warning, or critical) and secondly when to trigger the alert. In this example we want to create an alert when a RA fails to connect to MCS in a timely manner, implying it's gone down and needs some hands on assistance.

Ensure that the "When an RA fails to connect" radio button is selected.
Conditions
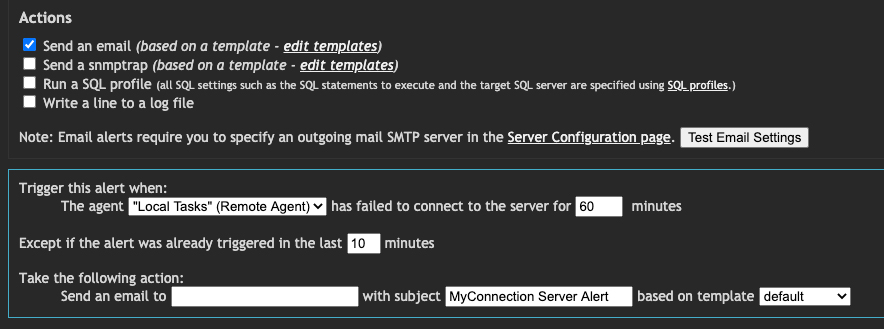
The next step is to set any conditions or exceptions for the alert. For this alert type the only options are to choose a specific RA name and whether to supress the alert if it occurs again with a certain period of time.

A single RA can be sent to numerous clients, so the name condition allows the user to specify RA names if the alert is only required for one specific instance.
The alert exception is simply to allow the user to supress alerts if triggered within X minutes of the last trigger. For example having an email sent once an hour for a RA that has gone down may be more manageable that one sent every minute.
When checking these options the actual setting of them appears in the bottom part of the page, explained below.
Alert Actions and Parameters
In this example we're going to set the alert to send an email.

So, the first step is to check the Send Email check box. Doing so will bring up the email options at the bottom of the page where the user can choose the email address, subject, and email template to use for the alert.
Also present for selection is the name of the RA that should be monitored for the alert and a downtime setting in minutes. As the "suppress alert" option was checked there is also a time setting for supresison of the alert if trigger numerous times.
When all the settings have been filled in click the Save button. The alert will now be active until deleted.
If the alert is not working as you'd expect please contact support.

